Thursday, September 30, 2010

6 Cartridge Card

From what I read on other blogs and on the Cricut Message Board, we all have several cartridges we have not used.  I made this card for the Bitten By The Bug 2 Challenge this week.  I used 6 cartridges, some of which I had never used before.

The challenge was to create a card using the sewing machine on the Heritage cartridge.  The paper I used is from the My Mind's Eye Out & About paper stack.  The cartridges and card elements are as follows:

Sewing Machine - Heritage - Cut at 3"X1.75" (Never used)
Flourish - French Manor  - I did use FM 1 time before
Labels - Stamping
The Word SEW - Wall Decor - (Never Used)
The Word Sweet - Create-A-Critter (Never Used)
Buttons - Paisley (Never Used)

I guess I should hang my head in shame for having cartridges I've never used.  I like the way this card turned out.  I hope you will be inspired to use your unused cartridges.

Thank you for dropping by today.  God Bless You..Peggy

Wednesday, September 29, 2010

Unscripted Sketches Challenge #74

Unscripted Sketches has a new challenge each Saturday.  This is the card I created for that challenge.  There is only a small amount of Cricut in it.  I used George to cut some of the basic shapes.

The background paper is from a stack Donna and I shared so I don't have the cover to know the name (sorry).  The bottom layer of the flower is made by cutting a 12" X 1 1/2" strip.  Score every 1/4" and fan fold.  Glue the ends together.  Working on a flat surface, fan the bottom out making a circle.  Place something on top for now to keep it from popping back up.  Cut a circle of paper and glue on the bottom of the flower to help stabilize it.  The top layer is another strip cut at 3/4" X12".  Use the same directions for this layer.  Glue it to the bottom flower and place a large brad or embellishment on top to cover the hole.  It's very simple. 

Please let me know how you make out with the pleated flowers.  If I can help you, please email me.  Thank you for following our blog.  God bless you.  Peggy

Tuesday, September 28, 2010

A Little Something For You

Well, I thought I would try something new tonight and I'm sad to say that it didn't turn out as good as expected. I used a digi stamp from Digital Delights by Louby Loo for the front of the card. This was my first attempt at coloring and I must say that I'm not near as good at it as my Mom.


I used a piece of paper from Big Lots for the background and then cut a circle with George and a scalloped circle with Mini Monograms. I punched a green strip of paper with the Martha Stewart Heart Punch.

You may notice that I colored the ribbons on the bug's dress green instead of pink. Light green is the color of ribbon that represents the kind of cancer that my dad died from. It's a very rare type of cancer and much more research is needed in order to find a cure.

I hope you'll forgive my bad coloring skills but they say practice makes perfect. Have a good day and God Bless! Donna

Monday, September 27, 2010

Santa Baby

I participated in Fright Night at Shelly's Images and won this Santa digistamp.  I couldn't wait to make a card with him.  He is so adorable.

I colored him with my Promarkers of course.  I hope the picture will pick up the shading.  The background paper is K&Company Christmas Cheer.  This paper stack has some really pretty pages.  It is double sided.  I used both sides of the page on my card.  I cut the circles using George and Basic Shapes and added some Christmas ribbon.  A very simple card but one I hope someone will enjoy receiving.

Thank you for visiting.  Your comments are appreciated.  God Bless You!!!!!  Peggy 

Sunday, September 26, 2010

Sweethearts & Cindy Loo - Happy Day

Hi Everyone!! I don't know if you'll remember the invitations that Mom and I made for my friend's niece but I went to a shower for Taylor tonight. The card below was made for her.

I covered the cardbase with pink glitter paper and then used the Cindy Loo Cartridge to cut the background paper out of the SEI White Elegance cardstack. Then I used the Sweethearts Cartridge to cut out the dress and the tuxedo at 4" for the front. I used a $1 Studio G stamp for the sentiment.

I'm happy to say Taylor liked the card. Well, Jacob asked that I tell you all HI! He said that he's always wanted his name to be on the internet so this should make him happy. Thanks for coming to visit and I hope you have a good weekend. Until another day, God Bless!! Donna

Friday, September 24, 2010

Shelly's Images Fright Night

Shelly's Images is sponsoring Fright Night on September 25th from 6 to 9 p.m. CST.  She will be having games, prizes, freebies, and lots of fun at the Shelly's Images group at Crafters Digital Art Center. I hope you will be there too!  Click on the weblink below.

Fright Night

Paper Roses

I think I have told you in the past I love to learn to make new things. I'm not so sure this is new. It seems it has been around before now. However, I got an email from Digital Delights at Loubyloo. They had a Saturday tutorial that shows how to make Paper Roses. Nathalie's was so pretty I just had to try them. However, mine aren't as pretty as hers.

In her instructions, Nathalie used a 5 petal flower punch. Sweet Treats Cricut cartridge has a 5 petal flower on it so I used that. I cut them at 1 1/2". You need 4. It was very easy to set them up in Design Studio or the Gypsy and cut them all at once. I did use the "hide contour" feature to hide the center cut out. Mine looked just like the ones cut out by the 5 petal flower punch.

I was going to post the pictures of my steps but Nathalie has done such a fabulous job with the tutorial I decided to post the link to it. If you click on Paper Roses above, it will take you to the website.

Thank you for visiting and following our blog. We love your feedback. Have a great day. God Bless You.... Peggy

Thursday, September 23, 2010

What I Found In The Mailbox Today

Donna and I have a close relationship aside from being mother and daughter. We like a lot of the same things. I posted a card called "Freshly Picked Geraniums" on September 20. I stated in my post I did not know the name of the paper stack.

I was talking to Donna about it and she said, "That is so weird I made a card today using that same page." I used one end of the page to make my card and she used the other end for hers. We live 3 1/2 hours apart so what are the chances we would use the same paper on the same day? Oh, by the way, the name of the paper stack is "Songbird".

Donna did not tell me who she made the card for. That is not unusual because she is always making a card for a friend or one of her volunteers. Lo and behold, I went to my mailbox this afternoon and there was an envelope from Donna. Inside was this beautiful card using our paper. She is so thoughtful and sweet. A mother could not ask for a more loving daughter. Nor could I ask for a more loving son. They have been my rock since my husband passed away.

Thank you, Donna, and I love you. Mom.

Hi Everyone - I thought I would put my two cents worth in on Mom's post. So hear goes - Mom, I love you too!! The fact that we chose to use the same sheet of paper on the very same day to make cards just shows how close we are!! We're thinking alike!! Love you bunches, my little mamacita!!! I'm so thankful that our relationship has evolved into not just being mother and daughter but into also being best friends!! You're the BEST!!!

Wednesday, September 22, 2010

Happy Fall Y'all

It seems Summer is hanging around longer than usual.  It has been in the 90's for a while now.  So I decided to make a card to welcome Fall hoping it will get here.  I don't like Winter but do love the cool nights of Fall and the warm days.

This card was made using a Digi-stamp from Doodle Pantry and the Freshly Picked Cricut cartridge.   I colored the digistamp with Promarkers, applied it to a glittery background of Fall colors with the greeting.  The pumpkins(cut at various sizes) were cut from Freshly Picked as well as the sign.  The pumpkin with the frog is a K&Company Tim Coffey sticker.   You can't have pumpkins without a carved face.

I cut a frame from the same glitter paper as on the front for the inside of the card using Lyrical Letters.  Then I added a little decoration. 

Tuesday, September 21, 2010

SWEET TREATS BIRTHDAY CAKE!

Hi Everyone!! I thought I would try something with my Sweet Treats Cartridge - a cartridge that I've had for longer than I want to admit and haven't done anything with it. I used Design Studio to weld the birthday cake and the cake plate together to measure 5" x 7". I cut the card base out of white cardstock. I then cut the cake plate out of green cardstock. I cut the cake again from patterned paper.
I used the Martha Stewart Gooey Goo Paper Punch to punch the pink patterned drippy icing. I used hot pink flowers from the $1 section at Micheal's to top off the cake.


I hope you like and I hope you'll come visit again soon. If you would like the cut file, please pm me and I'll send it to you. Until another day!! Donna

Monday, September 20, 2010

Freshly Picked Geraniums

I love flowers. One that my husband planted almost every year was geraniums. I saw these geraniums on my Freshly Picked cartridge and decided to make a card with it.


The card is an A2 card (4.25X5.5). I don't know the name of the background paper. Donna and I have a habit of buying a pad of paper and sharing it. If I'm at her house I get the cover it comes in because it's easier to keep it from bending while traveling if it's in the cover.  If she's here, she gets the cover.  (Does that make any sense?)  Well, any way she has the cover to this paper stack so I don't know what the name of the paper is.  I cut the base geranium at 3.75 X 5".  I then cut the various elements and added them.   I added chalk shading on the pot, flowers and leaves.  The little butterfly is a part of the background paper but I added stickles to his wings.   The sentiment is a Hero Art stamp.

The inside of the card leaves and flowers are leftovers from the cuts on the front.

I hope today is a glorious day for you instead of the Monday blahs.  Thanks for stopping by our blog.  God Bless You!!!  Peggy

Sunday, September 19, 2010

Happy Birthday, Ms. Ethel!!


I work with some of the BEST volunteers in the world and I made this card for Ms. Ethel that works in my office on Tuesdays. I try to make all the volunteers that work in our office a special card for their birthdays because they are such special people.


I used the 5 x 7 Dots Cuttlebug folder on the front of this card. I then cut a black piece measuring 1 1/2" wide. I then cut three scalloped circles using the Cricut Mini Monograms cartridge at 3 1/2", 3", 2 1/2". I used the Cuttlebug Dots folder on the black circle and one of the Cuttlebug Birthday folders on the 2 1/2" circle. I popped the top circle and used dimensional paint on the black circle. I applied some bling on both sides of the circles.

I hope Ms. Ethel likes it. Enjoy your Sunday and come to visit us again! Until another day!!  God Bless.  Donna

Friday, September 17, 2010

THANKS so much!!


I just love using my scraps!! I have tons of paper that I have a problem using because "it's so pretty" so I try to save all small pieces from that "pretty" paper and use them when I can. Mom and I recently made some invitations for a friend and I had some scraps let over after making them. These thank you cards were made using the scraps from the invitations. I'm going to be sending them to some of my former bosses that recently helped me raise money for the United Way. It's always good when you can help others.


I hope you have a good weekend and that you'll come back to see us soon! Until another day, God Bless! Donna

Another Vera Bradley Inspired Card

Vera Bradley has a lot of nice designs. I recently acquired a Vera Bradley pen. So I thought I would make a card to go along with the pattern of the pen which is called Cupcakes Pink.

This is the first round card I have ever made. I used George and Basic Shapes to cut my card base after welding the two circles in Design Studio. I used Lacy Labels to cut the scalloped circles. The green flower is cut from the Bloom cartridge. The white and pink flowers are cut from Picturesque. Of course, the blue circle and the white flower are cut from George. I added bright pink pearls for interest.

On the inside I used StoryBook to cut the Thank You. Stickles were added to dress it up a little. I'm so glad someone came up with Stickles. I wish it had been me.

Thank you for visiting our blog today. I hope you all have a great weekend. I'm headed for my son's in NC. He is singing a solo with a choir at a church near our old house. You know how we Mom's are. If the kids (no matter how old they are) are doing anything, we want to be a part of it. God Bless You !!!! Peggy

Thursday, September 16, 2010

Party Invitations

I have a wonderful friend named Sherry who has a niece that just had a birthday, graduated from college, and is getting married in October. Sherry is giving Taylor an all-in-one party this month and I volunteered to do the invitations for her. My mom helped me make these during my last visit to her house. And by the way, Jacob did say that I was "hogging his Mamaw" while we were working on them!! I wrote the poem and Mom cut out all the squares using George & Basic Shapes, which we rounded, and then she cut out the cowboy boot from Just Because Cards while I started assembling the pieces. We made quite a team while working on these!! Thanks Mom so much for all your help - could not have done it without you!!

Thanks for stopping by and we hope to see you again!! Until another day, God Bless!! Donna

Wednesday, September 15, 2010

Straight From The Nest Card

I redeemed some of my rewards points for Straight From The Nest.  It has some nice designs and features that I want to try. 

The background paper for this card is from DCWV Garden Party Paper Stack.  This is a 5X7 card.  The fence is cut at 3 inches.  It is on page 74 of the SFTN handbook.  I would have cut it a little taller except I wanted the leaves and the flowers to show.  The "Butterfly Kisses is cut at 1".  It is on page 33 of the same handbook.  I added stickles to the letters so the phrase since the rest of the card had glitter.

The words on the inside were cut at 1" and I used Plantin Schoolbook for them.  For the message area, I cut a turquoise shadow at 6 1/2 X 4 1/2.  I then cut the top layer from the same paper as is on the front. 

We appreciate all of our followers and hope we can inspire someone to reach beyond themselves and create something beautiful.  You can do it.  You're all so talented.  God Bless You.  Peggy

Tuesday, September 14, 2010

Hello Kitty Birthday Card

I don't know about you but I just love Hello Kitty!! I know that a person my age probably shouldn't like her as much as I do but I just can't help it. I just think she's so cute!! I made this card using the Hello Kitty Greetings Cartridge and cut her at 3". I found some Hello Kitty ribbon at Hobby Lobby a while back while there with my mom (my favorite shopping buddy) and we both bought some. Yet another September birthday card down. Only a few more to go. I'll be glad when October gets here - I only have to make one birthday card for that month - YEAAAA!
Thanks so much for visiting with us!! I hope you have a good day!! Until another day, God Bless!! Donna

Monday, September 13, 2010

Crimped Diamond Card

I hope you all had a great weekend.  Mine was busy.  I didn't get a lot of crafting done though.  However, I wanted to show you this card.

The background I did using a technique I learned on Splitcoast Stampers.  This link should take you directly to the tutorial.  There's a video at the bottom of the tutorial page, also.  The paper crimper I used was a cheapie and did not crimp as well as I would like it to.  I bought a better one yesterday at Michael's and used my 50% off coupon.  It works much better.  I like the effect of the crimping in this pattern.  It's not simply plain.  I cut diamonds from navy, floral and cream card stock and added some bling and ribbon to perk it up.  There's no Cricut in this card but you could cut the diamonds in Cricut.  It's a very simple card but sometimes simple is good.

Thank you for looking and I hope you will find some inspiration for a new project.  God Bless you.  Peggy

Sunday, September 12, 2010

HAPPY GRANDPARENT'S DAY, MOM!!!

Today is the day that grandchildren are supposed to honor their grandparents. Well, I've said it before and I have to say it again, my son thinks the sun rises and sets in my mom's, otherwise known as Mamaw, eyes. He thinks there is no one like his Mamaw!! When we are visiting her or when she comes to our house, he gets mad if he thinks I'm "hogging his Mamaw" - if he thinks she's not paying him enough attention. Yes, he's spoiled in a good way and I must say that Mamaw helped along with that. Last week when we were at Mamaw's house, Jacob took Mamaw into her bedroom to watch one of his movies. Well, I sat down at the dining room table to work on something and my Mom happened to glance over at me to see what I was doing. Well, Jacob proceeded to get off the bed and close the bedroom door. He said that I was distracting Mamaw!! He's a mess but he's very protective of his "Mamaw time"!!

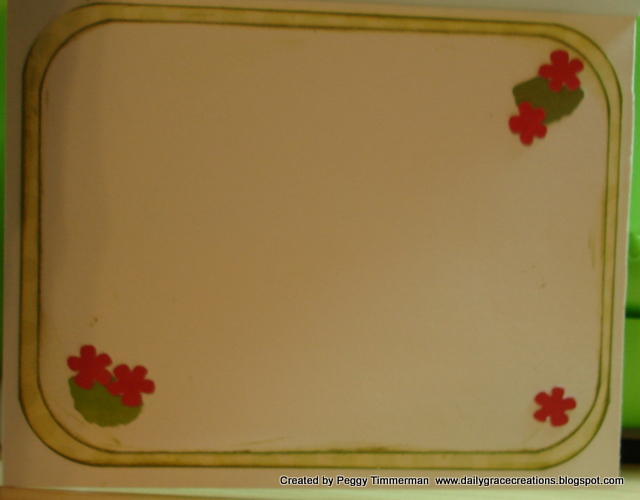
Jacob and I made this card for Mamaw for Grandparent's Day. I have a little surprise for her that she'll get whenever we visit each other next. This is just a simple card but it holds a whole lot of love for the person receiving it.

I cannot let this day go by without saying Happy Grandparent's Day to my daddy who I know is watching over Jacob from Heaven. They had a very special relationship too. Jacob misses his Papaw greatly (as we all do) and there's hardly a day goes by that Jacob doesn't mention something his Papaw said or did. Every night when he is saying his prayers, he prays to God to "please tell Papaw I said HI!" I'm sure that Daddy hears Jacob's prayers!!

A child's relationship with his/her grandparents is so important to a child. I am so thankful that my son has been able to experience a wonderful relationship with both my parents.

Thanks Mom and Daddy for being such wonderful grandparents to Jacob - we love you bunches!!! Happy Grandparent's Day!! Until another day, God Bless! Donna

Saturday, September 11, 2010

Larelyn Inspires Some Organization

Larelyn at Handmade From The Heart posted some tips on Wednesday, September 8 about organizationOne of them was how she organized her "bling".  I was especially interested in this because I have a basket full and have to sort through it everytime I want to use it.  So I took her advice.  I had a spare notebook (Cricut Green, of course.  So I bought some plastic photo pages from Office Depot and used those to sort my bling by color.  Now when I want to use it, I will only have to turn to the color I want and choose what I need for my project.  I'm not sure what Larelyn said she got to go in her notebook but the photo pages work great.

I was already using trading card pages and a notebook for my small clear stamps, i.e., Studio G stamps.  Now I need to come up with a way to organize some of my other "stuff".  Please check out Larelyn's blog for other tips.  Her link is above.

I hope you all have a great weekend and that God Blesses you real good in your place of worship.  Peggy  

Friday, September 10, 2010

The Big 50

This birthday card is for my son who is turning "The Big 50" this month. It is hard for me to believe. It seems only yesterday we were growing up together. My husband and I got married when we were children so my kids and I have always said we raised one another. He is a son to be proud of. Both of my children have really stood by me since my husband's death. I love them dearly.

I used Kraft paper for the card base. I embossed it with a Cuttlebug folder (don't know the name). Then added swatches of SEI Moravia paper. The word "the" was cut from Mini Monograms cartridge. The word "big" was cut from Ashlyn's Alphabet cartridge. I added some embellishments and a "50". The "50" is from a Thickers Alphabet I purchased at Big Lots. They have them at Hobby Lobby. I then added some pen stitching for an added touch.

My son works with computers so I thought it would be fitting to work a computer into this theme somehow. I cut the computer from the Locker Talk cartridge. I can still write a message on the inside.

Thank you for stopping by our little section of the web. We love your comments and visits. God Bless You!!! Peggy

Thursday, September 9, 2010

Another Quick and Easy Card

Guess what I found in another drawer?? Some more scraps that I could use for a card. I had cut the frame out on this card a long time ago but it was too big for what I wanted to use it for. So I put it in a drawer for safe keeping. I can't really say how long it's been in that drawer but it's been a while. It's been so long that I can't remember what cartridge the cut was from. Well, I decided to take it out and use it for one of the many cards that the month of September requires for our family.


I do know that the "Thinking of You" came from the Lacy Labels Cricut Lite cartridge. Now all I have to do is decide what member of my family I'll give it to for their birthday. Some days you need something quick and easy to make and today was one of those days!!

Thanks for coming for a visit and we hope you come again soon!! Have a "Happy Day Before Friday" day!! Until another day, God Bless!! Donna

Wednesday, September 8, 2010

Pinwheel Card

I received my copy of "Cards" magazine in the mail a couple of weeks ago. I usually just flip through it and lay it aside because I like to come up with my own ideas (not always successful at that). However this issue has a neat section on cards with pinwheels in it. I knew I had to try this. The card I made is below, but before I show you the card, I would like to show you how to make the pinwheel. Now I know you talented people probably already know how to make a pinwheel, but I have to admit I didn't. So this is new to me. Now be kind, don't laugh too hard at me for that.

Pinwheel:
Begin with a square of double-sided patterned paper. The measurement from corner to corner will be the finished size of your pinwheel.

With a pencil, draw a line from corner to corner.

Cut along each of the lines, a little more than halfway to the center. Erase the lines if needed. Pierce a hole through the center of the square and through every other point around the outside.

Bend the pierced corners to the center without creasing the paper.
Line up the holes and fasten a brad through to hold the paper in place.

You can add a dimensional sticker or another fun embellishment to the center of your finished pinwheel but my brad was big enough that I liked the finished product as it is.

This is my card. One more September birthday done. You can use George and Basic Shapes to cut all the cuts for this card. They're basically all rectangles cut to various sizes, punched with Scroll Lace Martha Stewart punch, and layered on a base. The inside message area is inked with Hot Pink ink.

Thanks for visiting our blog. Donna and I love your comments. Thanks to all our followers. You make this blog worthwhile. We feel as though you are our friends. God Bless you. Peggy

Tuesday, September 7, 2010

Thanks!

Hello Everyone!! I am one of the lucky people that has a fantastic boss! My boss is one of the most thoughtful, caring people that I've ever met. She is always doing little things to brighten my day. Most recently, she knew that my daddy's birthday was coming up so she gave me a beautiful picture frame with a picture of my dad in it along with a lovely card. She said she wanted to let me know that she was thinking of me!! I told you she was thoughtful!

Well, I made her this thank you card. It's not an elaborate card but I thought it was cute. I simply used a piece of my scraps to cover the cardbase. Then I applied a butterfly and flower sticker that I had bought a Walmart. I used a $1 stamp from Michael's for the sentiment. Simple but sweet!! I hope she likes it!!


We hope you had a good Labor Day holiday. Thanks for stopping by and we hope you'll come again!! Until another day, God Bless!! Donna

Monday, September 6, 2010

4th Grade Classroom Door

Hey Everyone - I hope you all are having a wonderful Labor Day. I spent the weekend with my mom celebrating her birthday which is TODAY!!! So everyone wish Mom a Happy Birthday!!! Happy Birthday, Mom - I love you bunches!!!! I told her that everyone in the U.S. was getting the day off just to celebrate her birthday - HA!!!

Now on to our project for the day - Jacob's teacher asked for volunteers to decorate her door to the classroom each month this year. Well, you know I had to volunteer as that's right up my alley! She said she wanted a rocket/space theme to go along with what they are teaching in class right now. The picture below is what I came up with.

I used the following cartridges to create the images:

Just Because Cards - Rocket - cut at 24"
Zooballoo - cut out clouds and inked them to make them look like smoke balls coming out of
the rocket.
Plantin - Stars
Plantin - Scalloped Border with Stars - I used Design Studio to place a star inside the scallop
border and cut at 22"
Mickey Font - Words - cut at 3 3/4"

You'll be seeing a new door design each month this year. Next month's theme is going to be a football/teamwork theme. I've already got an idea for what I'll do for that - gotta stay ahead of the ballgame you know. Well, thank you for stopping by and we hope you'll come again soon!! Until another day, God Bless!! Donna

Sunday, September 5, 2010

A Thorn in My Flesh

This card has been a thorn in my flesh today.  I know I must be bleeding from being pricked by it.  There is just something about it I don't like and I can't put my finger on it.  I need some male birthday cards but I'm not sure I will send this one.  LOL

I started by embossing my background paper with Distressed Stripes Cuttlebug folder.  My card is actually taller than the folder but I turned it around and embossed the other end of the card.  That made a definite mark so I covered it with "Happy Birthday" ribbon.  I cut 3 1 1/2" scalloped circles from Lacy Labels cartridge; embossed them with the Birds & Swirls Cuttlebug folder making sure to get a bird in each circle.  I popped the circles with pop dots.  The bird house is a  digistamp from Creative Mind of Silvie.  (This lady is very generous with her digis.  She has a free one every week.  Be sure to check her out.)  I inked the edges of the card with brown ink.

I'm asking for constructive criticism on this card.  I'm thinking the background is not dark enough.  It looks pinker in the picture than it really is.  It's a light terracotta.  I've asked Donna about it but I think she's afraid she'll hurt my feelings.  LOL. 

Thanks for dropping by our little place of happiness.  We love your visits and comments.  God Bless You.  Peggy

Friday, September 3, 2010

French Manor/DoodlePantry DigiStamp

I received  my French Manor cartridge in the mail a while back and have not made anything with it.  With all our birthdays, I pulled it out today and chose the frame on Page 54 of the handbook to make a background for my card. 
The pear and greeting is a digistamp I purchased from Doodle Pantry.  I colored it with Promarkers.  I really like the Promarkers.  I haven't had a chance to use Copics so I can't compare the two. 

The inside top is a piece left over from the frame cut.  I inked it with brown ink and cut a Happy Birthday from Beyond Birthdays.

Thank you for looking and I hope you find some inspiration.  God Bless YOU!!!!!  Peggy

Thursday, September 2, 2010

Birthday Card - Cricut Lite Lacey Labels

Hello Everyone! You know it's amazing the things you will find when you are specifically looking for something that you put somewhere so you would remember where you put it. I don't know about you but when I do that, I never find what I'm looking for! The other day I was looking for that one elusive item and I came across the label on this card. My mom actually made this label using Lacey Labels during a weekend visit to my house. I was busy taking care of Jacob so Mom just made herself at home in my "Happy Space." It's a funny space, it makes you HAPPY just being in it - but I digress!!
As I said, I came across this label in one of my organized (HA) drawers so I decided to make a card with it!! All paper used on this card were scraps - YEA! I covered the base of the card with pink Bazzill cardstock, applied the label that my mom had already made, used a Martha Stewart punch on the dark green cardstock, tied a bow with a coordinating ribbon around green cardstock, and applied the green paper to the side of the card. And wah-la, a card is born! Oh, I forgot to mention that I used a Michael's $1 stamp for the Happy Birthday sentiment. One more card completed of the MANY September birthday cards that I have to make!!


It's amazing how fast I made this card and all by simply using scraps from a drawer. If you are a member of my family and you get this card in the mail, please act like you've never seen it before!! Just know it was made with love!!

Well, thanks for stopping by and as Grandma Ruby always used to say in her sweet Southern accent, "Ya'll come back now, ya hear!" Until another day, God Bless!! Donna


Wednesday, September 1, 2010

I'm so PROUD of you, MOM!!!

Hello Everyone!! I just want to share how very proud I am of my Mom!! She has made the Cricut Chirp for the second time since starting this blog just two months ago! As we have said before, we started this blog because my dad always encouraged us to do so! He was our biggest fan and after his death, we decided this was our way of honoring him and all that he meant to us!

My mom has put hours and hours of work into this blog to make it something that my Dad would be proud of. All of you our followers prove that her hard work has not been in vain. You bless our lives daily with your encouraging words and visits to our site. I know my Dad is looking down from Heaven with the biggest smile on his face as he watches my mom receive honors such as being included on the Chirp!! I, myself, think he might have a little something to do with it because in my Daddy's eyes there was no one like my Mom and he wants her to know that he's still watching over her.

Congratulations, Mom, on receiving this honor once again!! You deserve it and I'm so very proud!! Love you bunches!! Love and miss you bunches, Daddy!!

Thanks everyone for visiting and following our blog. You'll never know how much it means to us!! Until another day, God Bless! Donna
Cricut Top 40