Wednesday, November 30, 2011

Visions of Christmas Card

For those of you who tried to comment yesterday and could not find the comment button, I apologize.  When I posted my card, I accidentally check the button not to allow comments.  That is a major boo boo since we look forward to your comments.  Donna sent me an email, "Mom, why do you think no one is commenting.  I thought Nathaniel's picture would create a lot of them."  So sorry.

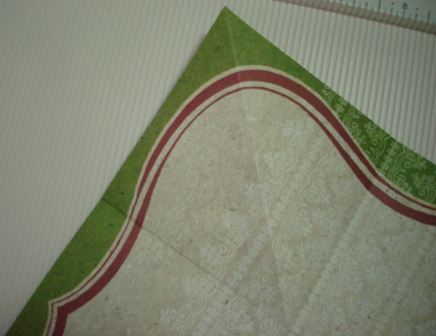
I went to Michael's last week to pick up a gift card.  While I was there I made the mistake of looking at the Christmas paper and embellishments display.  My OCD (Obsessive Crafting Disorder) kicked in.  I bought 2, yes 2, stacks of paper.  Of course, they were 40% off.  They are Elizabeth Brownd Designer Paper and Elizabeth Brownd Specialty Paper.  I just love them.  I used the Designer Paper to make this card.  Oh, and by the way, I forgot to get the gift card and had to go back.  LOL

When I saw this dove, I knew it, by itself, would make a beautiful card.  There is a ribbon on the paper coming from the dove's mouth but I thought it would be interesting to add ribbon to make it more dimensional.  I also cut some holly using Joys of the Season.  I believe I cut it at 1".  The word "peace" is from the same cartridge.  I added some stickles to the leaves and added red gems for holly berries.  Sometimes I think you just need to let the paper be the focal point and this is one of those times. 

Challenges for this card:
365 Cards -Winter Theme
Going Grey With Scrap-Creations - Christmas
Partytime Tuesdays - Anything Goes
Craft Your Passion - Tis the Season... (Anything Holiday or Winter related)
Make it Monday - Always Anything Goes
Paper Creations Ink - Christmas
The Crazy Challenge -  Stars and/or Snowflakes
The Ribbon Reel - Anything Goes

Thank you so much for visiting with us today.  We know you could be visiting somewhere else but we're glad you stopped by here.  God Bless You!!!!  Peggy

Tuesday, November 29, 2011

Birthday/Encouragement Card for Grandson #2

Nathaniel is my second grandson. Since he was 7 and was in his first Community Theater production of Winnie the Pooh, he has wanted to become an actor. He is the most determined young man I have ever met. He lived in New York City for 6 years and has now moved to Los Angeles to pursue his dreams. His birthday was last week, so I made him this combination card, part birthday and part encouragement card.


Card Recipe:

5"X6.5" card base
Background Paper - DCWV Natural Paper Stack
Never Give Up, Film Strip - Cut from Wall Decor Cricut Cartridge
Stars - Cut from A Child's Year Cricut Cartridge
Inside labels - Cut from Storybook Cricut Cartridge
Inked edges in Chestnut Roan Colorbox Chalk Ink


I kept the inside simple to write my message to him on.


Challenges for this card:
Crafty Boots - Anything Goes
Lexi's Creations - "One For the Lads" (Man/Boy)
Make it Monday - always Anything Goes
Paper Playtime -Say It With Sentiments
Simon Says Stamp and Show... - Stars
The Ribbon Reel -Anything Goes

Thank you for visiting with us today. Your visits and comments are so meaningful. God Bless You !!! Peggy

Monday, November 28, 2011

Don't Give Up On US

Good Monday Morning.  I hope your week is going to be filled with good days and kind words.  I know we've been MIA for a few days, but don't give up on us.  We'll be back tomorrow.  I'm designing a birthday card for my grandson  but I don't have it finished.  God Bless You with joy and His peace!!!!  Peggy

Friday, November 25, 2011

HAPPY BLACK FRIDAY

 How many ate too much yesterday?  Come on, be honest.  I had to repent I ate so much.  My poor little stomach didn't know what to do with that much food.  LOL We are so blessed.

We are sorry for not having anything to post right now.  We camped out at Toys R Us for 4 hours yesterday (they opened at 9:00pm on Thanksgiving) to get Jacob an Ipod Touch for Christmas.  It got rather nippy.  We had never done anything like that so that was a new experience.  We're leaving out this morning around 5:00am in search of more bargains.  What I don't do to spend time with daughter and daughter in law.  We're having a blast.  Be sure to check back tomorrow.  We love you guys.  God Bless You!!!  Peggy

Thursday, November 24, 2011

Santa and Poppett - Elegant Edges, Digital Delights by Louby Loo

Hi Everyone!  My mom and I hope you all are having a very Happy Thanksgiving!  One of my favorite foods is my mama's cornbread dressing.  It is the best in the WORLD so believe me, I will be eating a LOT of it today!!

For my post today, I chose to use the Santa and Poppet digi by Wendy at Digital Delights by Louby Loo.  


First, I cut a piece Black Bazzill Cardstock cut at 6" x 12" - then I folded in half. 

I ran a piece of white cardstock through the Cuttlebug using the snowflake embossing folder. 

I then cut two strips of black paper at 3/4" by 6" and crossed them over the white cardstock.  I then placed a piece of red cardstock on top of the black strips. 

I used the Elegant Edges Cricut Cartridge to cut the black and red circles at 5" and 5 1/2" - then I placed the colored digi on top of the red circle.

I then added pearl bling (a girl always needs her bling).

I used Ranger Star Dust Stickles on Santa's fur.

Now isn't that just the cutest?  I really like the black, red, and white look. 

Challenges:

House That Stamps Built - SIO - Christmas card+snowflake
I Love Promarkers - Must use Promarkers - #93 anything goes
Little Red Wagon - #108 Christmas
My Mum's Craft shop - 3E - #33 things with wings
Papercraft Star - #71 anything goes*

Thanks so much for stopping by on this Thanksgiving Day!  One of the things Mom and I are thankful for this year is you - our followers!  We so appreciate your visits and your comments.  Until another day, Happy Thanksgiving and God Bless You!  Donna

Wednesday, November 23, 2011

Warm Winter Wishes

We are gearing up for Thanksgiving at the Timmerman household today.  I'm going to start preparing some of my dishes that I can prepare ahead of time, then bake tomorrow.  I am going to bake a Hershey Bar cake.  Donna and her family will be arriving around noon.  Brian and Terrie will get here tonight.  I can't wait for all of them to get here.  I wish I could have all of you here as well.  Oh well, I guess I'd better get on to my card for today's post.


I purchased this digistamp from Funky Kits.  It is a Sugar Nellie Digi.  Sugar Nellie produces some of the cutest digis I've seen.  I bought several so I will be showing you some more later.  I used the Snow Angel Imagine Cartridge for the Christmas ornament shape.  I didn't print it, just cut out the shape.  The snowflakes are cut using Joys of the Season cartridge.  Warm Winter Wishes is cut from the Winter Woodland cartridge.  Oddly enough, that is the name of this digistamp.  I used Promarkers to color it.  Promarkers used are:


Scarf and Hat - Lipstick Red, Crimson
Penguins - Cool Grey 1, 3 and 4
Feet and Beaks - Buttercup, Gold
Package - Line Green, Lime Zest, Baby Pink

Challenges for this card:
Cardmadfairy's Digi Days Challenge -  must use a digi - texture
Crafty Catz -  snowflakes
Floweret - Christmas
 Inspire Me Fridays - always anything goes
 Phindy’s Place - Christmas cards
Winter Wonderland -   any cute image

Thank you for visiting with today.  Donna and I hope every one of you have a blessed Thanksgiving and you have a wonderful time with your families.  God Bless You!!!  Peggy

Tuesday, November 22, 2011

Christmas Bells-MMSC #131

For my Design Team post today on Midnight Madness Sketch Challenge, I chose Priscillastyles Christmas Bells.  I love this digistamp because you can do so much with it.   You actually get two digistamps when you purchase it.  

Card Recipe:

5"X7"  Card Base
Background Paper - Some Christmas paper from my stash.
Digital Image - Christmas Bells by priscillastyles
Holly- cut using Joys of the Season Cricut Cartridge.
Gold balls and gems - Purchased at Hobby Lobby
Promarkers used to color image:
Bells - Red
Ribbon - Red, Crimson
Leaves - Pear Green, Holly, Grey Green
Frame - Gold gel pen

Here are the sketches for the challenge.  You can always choose between CAS or Fancy to make your card.  I do hope you will link up your project at MMSC.  Priscilla always has someone sponsor her challenges so you could win.
 Clean and Simple
Fancy
Challenges for this card:
 One Stitch At A Time - Anything Goes  
Sparkles Forum - 2W -Vintage Christmas
The Crafty Pad - Festive Cheer, Lets see some traditional colours: Red & Green & Gold or Silver
 2 Sisters - #66 Let it sparkle
 Outlawz Challenges- Project for what ever Winter celebration your family shares

Thank you for stopping by today.  It's always good to hear from you.  God Bless You!!!  Peggy

Monday, November 21, 2011

Fantabulous Cricut Challenge Blog Thank You Card

Before we get to today's post, I would like to announce my winner of the Fantabulous Harvest Blessings Cricut Crawl.  It is Suzanne.  She posted this:
Suzanne cricutcraftingrammyblogspot.com said...
Love the beautiful place cards and napkins rings. Also love to see you used your Imagine. Inspires me to use mine more.
 Congratulations, Suzanne.  If you will email me with your address, I will get your Michael's gift card to you.  Now on to our regular post
 

Mondays mean there's a new challenge at Fantabulous Cricut Challenge Blog.  Today's challenge is to create a card with the words Thank You on it.  

I chose the Wild Card Cricut cartridge to create this scalloped card cut at 5".  I inked around the edges with brown.  To create the opening,  I chose the Thank You from Paper Lace II and welded it in the center of the card.  I cut the Thank You out and popped it with adhesive foam dots.  I threaded ribbon through the opening on the scallops, then applied some bling from my stash.  This card was very easy to make.  Wild card has some fun cards on it.  I don't know why I don't use it more.

This is the inside of the card.  I hope you will swing by FCCB and enter our challenge this week.  The Design Team will have a lot of inspiration for you.

Challenges for this card: 
Corrosive Challenges - Give Thanks (ends 26th Nov)  
Creative Inspirations Paint - Thanks 
Outlawz challenge - "Thank you" Card using Fall Colours
Catch The Bug - Give thanks/Thanksgiving
 My Sheri Crafts  -  Be Thankful


Thank you for visiting with us this week.  I know we're all gearing up for Thanksgiving and quite busy so your visits are especially meaningful to us.  God Bless You!!!!  Peggy

Friday, November 18, 2011

BEST FRIENDS HAPPY BIRTHDAY CARD - BEST FRIENDS IMAGINE CARTRIDGE

Hi Everyone - well, I've fallen in love again!  With who or what you ask?  My Imagine!!!!  I just made a card in less time than it normally takes me because I used my Imagine and the Best Friends cartridge.


I printed the yellow background paper and the cloud background paper.  I then printed the frame and all the layers at 5".  I then cut the tree limbs and birds at 1" and the label on the front at 1.25".

I pop dotted all the layers on top of each other and attached it to the yellow background paper. 

Challenge for this card:
I really like how this card turned out and how easy it was to make.  Thank you so much for stopping by today - we hope you'll come back again soon!  Until another day, God Bless You!!  Donna

Don't forget, you still have time to join in the Fantabulous Harvest Blessing Cricut Crawl.  Just click here.  Mom is giving away a $10 Michael's gift card.

Thursday, November 17, 2011

STANDING SANTA - CHRISTMAS CHEER, DIGITAL DELIGHTS BY LOUBY LOO

 IF YOU'RE LOOKING FOR THE FANTABULOUS HARVEST BLESSINGS CRICUT CRAWL CLICK HERE.

Hey Everyone - I picked this Standing Santa digi to work with for my Digital Delights Digi project this week.  This digi comes porecolored so that makes it extremely easy to work with.

I found a card base on Christmas Cheer that I used to cut out the cardbase at 7" x 5".  In the Cricut Craftroom, I merged a sleigh into the corner of the cardbase.  I then cut two strips of patterned paper.  I placed the Santa digi on a green square and popped him.  I used Word to print off the sentiment and glued on buttons. 

I covered the inside of the card with patterned paper.  I used the Martha Stewart Snowflake Punch to create a border down the middle of the card.  I glued the negative from the front of the card sleigh to the inside. 


This little Santa just makes me smile to look at him.  Please stop over at Digital Delights - Wendy is having a BIG sale.

Challenges for this card.
Digital Tuesday – Christmas Time
Sassy Cheryl’s – Anything Goes
Daisy Doodles Creating Challenge – Anything goes with a digi
Make it Monday – Anythng Goes
The Crazy Challenge – Recipe – 1 Image – 2 Paper, 3 Embellishments

Please come back again tomorrow - we appreciate your visits and comments.  Until another day, God Bless You!!!  Donna

Wednesday, November 16, 2011

My First Card With Santa's Village Imagine Cartridge

I have been visiting The Cricut Couple's blog drooling over Bobby's cards he's made with the Santa's Village Imagine Cartridge.  That man has amazing talent.  Well, I finally got my cartridge today.  I just had to make something with it.  
 I cut 2 of everything.  These are the measurments of the elements:

Christmas Tree - 6"
Doll - 2.5"
Teddy Bear - 1.75"
Jack-in-the-box - 2"
Rocket: - 1.75"

I put foam adhesives between the layers to give them a 3D effect.  I don't know if you can see it but I added stickles to the stars and the candles.  I also added Glossy Accents to the little doll's face and hands.  Dolls I played with as a child had shiny faces and hands and feet.  Hmmmmm.  If I played with Vintage Dolls.......I guess that makes me Vintage.  LOL.  Ouch.  But I don't feel vintage.


The inside of the card is very simple.  I used a design that comes on the imagine to cut the labels.  The striped paper is on the Santa's Village cart.  They were inked in Christmas green.


Thank you for coming by today.  We welcome your visits and comments.  Please come back tomorrow.  Donna has a darling card to show you.  God Bless You!!!
For the Fantabulous Harvest Blessing Cricut Crawl click here.

Tuesday, November 15, 2011

FROM OUR HOUSE TO YOURS - WILD CARD, DOODLE PANTRY

If you're looking for the Fantabulous Harvest Blessings Cricut Crawl, please click here.

Hi Everyone - I thought I would make a card using a cartridge that I haven't used in a lonngggg time.  Laurie at Doodle Pantry has a lot of new digi stamps and I really love the Christmas Wreath.  I found this card in the shape of a house on the Wild Card Cartridge.

I cut the cardbase out of red shimmer paper at 7 1/4".  Then cut the layers out for the roof and the outline for the windown on the house.  I printed out the colored Crhistmas Wreath from Doodle Pantry and popped them together around the window.   I printed out two smaller wreaths and popped them on the door.

I then cut out the envelope for the house card.  It's hard to tell in this picture but the card forms a door.  I printed out one more wreath and adhered it to the door on the envelope.  This card was so easy to make - it makes me wonder why I haven't used this cartridge more. 

Thanks for stopping by - we appreciate your visits!!  Please drop by Doodle Pantry to see all the digis available.  Until another day, God Bless You!!  Donna

Monday, November 14, 2011

Fantabulous Cricut Harvest Blessings Crawl

Welcome to our blog and the Fantabulous Cricut Harvest Blessings Crawl...Fantabulous Cricut's version of a blog hop!  It's Fall and everyone at Fantabulous Cricut has decided to create projects to give thanks for our Harvest Blessings!   Each Design Team member will be featuring an original Fall project that includes Brown, Orange and Red – along with at least one Cricut cut.

If you've come from visiting Melissa at Create With The Cricutkateer, you're in the right place! If you've just happened across my blog and would like to play along with our Fantabulous Cricut Crawl, start HERE .

Make sure to check out each DT member's blog for some awesome inspiration! There will be PRIZES along the way at some of our DT members' blogs, AND there will be a Grand Prize up for grabs at FCCB for one participant that submits a "Harvest Blessings" project at FCCB!

When I started thinking about my "Harvest Blessings", I knew immediately the biggest blessing in my life next to the Lord Jesus Christ, is my family.  How I decided to portray this was to create napkin rings and place cards for our Thanksgiving table.  Here is a picture.  They're not extremely detailed and were quite simple to make.  I'm working on another project I hope to post later this week.  So check back.

I used the Thanksgiving Cricut cartridge to cut the napkin rings and the placecards from shimmer paper.  I love that paper but it is very hard to photograph.  From the Enjoy the Seasons Imagine cartridge, I printed and cut the leaves and acorns for the napkin rings and then the pumpkins for the place cards.  I used the font on the exclusive Cricut Craft Room Basics cartridge to cut out the names.  I welded the letters together.

My prize will be a $10.00 gift card from Michael's.  In order to be eligible please be a follower and leave a comment on this post.  This blog hop will be for one week.  You will have until Sunday night at midnight to enter.  Since FCCB will be announcing the Grand Prize winner on Wednesday, Nov. 23, that is when I will announce my winner. Unfortunately, I will only be able to mail within the continental United States.

Now it's your turn! Let's see your Harvest Blessings projects!  Make sure to include a Cricut cut somewhere on your project and be sure to use the colours Brown, Orange and Red as well!  Post them on the Fantabulous Cricut Challenge Blog.  I can't wait to see what you create.  I'll be over there checking.

Next stop… Robin's blog at Robin's Creative Cottage.  Go and see what she has in store for you today.  And when you're done, make sure to link up your project to FCCB's Fantabulous Cricut Crawl post to be entered into the contest!

Thank you for stopping by today.  I know you are going to love my team mates projects.  God Bless You!!!! Peggy 
Happy Crawling!
__________________

Jewels 
Lisa F 
Peggy 

Saturday, November 12, 2011

12 Drummers Drumming - Fancy Frames, Digital Delights by Louby Loo

Hi Everyone!!  Today is the final day of the "12 Days of Christmas" over at Digital Delights by Louby Loo.  I decided to decorate a gift bag with this cute "little drummer boy".

I colored the digi with Promarkers  - I then used the Fancy Frames cartridge to cut out the shadow at 6" and the overlay at 6".  After adhering the digi to the frame, I secured it on the front of the bag.

I then cut a gift tag from the Joys of the Season cartridge at 3" and tied it to the bag with Christmas ribbon.   I thought the image needed a little something so I added some bling! 

Wonder who's Christmas gift will go in this bag??  Go on over to Digital Delights and see all the beautiful creations I hope you have a great weekend - enjoy the fall colors on the trees.  Untril another day, God Bless You!  Donna

Friday, November 11, 2011

Holiday Paper Bowl Tutorial

As I said yesterday, I have the instructions for the Holiday Paper Bowl.  Of course, it could be used for other occasions depending on the paper you use.

First. get a 12"X12"  double sided piece of cardstock.  Here is the one I'm using today.  

Next score at 4" and 8" along one edge of the paper.  Turn, score at 4" and 8" again.  Fold along all scored lines.

Next, score diagonally in each corner.  Fold corners in.

Next set eyelets in each corner.

Run ribbon through eyelets to hold bowl together.  I would have used a jump ring but I didn't have any.  

Make a bow for the top and decorate.  I cut out some elements to go on my bowl but they got lost when I put them on the paper.  So it looked better without them.

Thanks for stopping by.  I'm sure a lot of you know how to make these already.  I didn't so I thought I would share them with those of you who don't.  God Bless You!!! Peggy

Thursday, November 10, 2011

Holiday Paper Bowl

We told you we met some wonderful Circle members at the Cricut Circle Meet in Greenville, SC last Saturday.  One of them taught us how to make this little bowl.  It can be used as a container for handmade goodies to put in.  If you will come back tomorrow I will give you detailed instructions.  It has been a harrowing week so I wanted to show you this lovely project.

Now meet the lady who taught this to us.  Her name is Barbara Stewart and she is such a delightful person.  She's on the Cricut Message Board and I love her postings.  She has a wonderful sense of humor.  Get a load of the scarf she purchased at Cracker Barrel.  This is Barbara in all her glory.

I'm posting some more pictures.  See how much fun was had.  Unfortunately we didn't get pictures of everyone.  We didn't even get pictures of us.  So if anyone has more pictures please let me know.  


Thanks for visiting with us today.  Be sure to check back tomorrow for instructions of this little bowl.  I'm going to be making several of these this year.  God Bless You !!! Peggy

Tuesday, November 8, 2011

Miss Froo Froo - Midnight Madness Sketch Challenge #129

It's time for another Midnight Madness Sketch Challenge.  For my Design Team Post, I chose Priscilla's Poodle Bling Digital Stamp.  Isn't she adorable?  I think she is just so cute.  I named her "Miss Froo Froo".  I hope you will join us week. You can do fancy or clean and simple.  See the sketches below.

Card Recipe:
5 X 6.5" Card Base
Background paper - KandCo. Botanical Paper Stack
Digital Image - Poodle Bling by priscillastyles
Fancy Frames Cricut Cartridge for the frame around Miss Froo Froo.  
Ribbon
Bling
Promarkers used to color the digistamp:
Poodle - Cool Grey 1 and 3
Bows and Collar - Orchid and Amethyst


Here are the sketches for this week.
 Clean and Simple
Fancy
Challenges for this card:
Digi Makeover Challenge - Must Use Digi 
Daisy Doodles Creative Challenge - Anything goes with a Digi
Forever Friends -Must Use Animal Bling Bling 
Heart Song Inspirations - Anything Goes
Make it Monday - always Anything Goes


Thank you for visiting our blog today.  We look forward to your comments.  Be sure to visit Midnight Madness to join in the fun.  God Bless You!!!  Peggy

Monday, November 7, 2011

Star Fold Nativity Card

In September I made my first Star Fold Card.  You can find it here with the directions.  Shortly thereafter, while thinking about Christmas cards, I thought the star fold card would make a nice Nativity Scene card.  I decided to make one to enter the Holiday card competition at the Greenville, SC Cricut Meet.  Oh my, there were some gorgeous cards.  Those ladies were amazing.  My card didn't even win an honorable mention.  LOL

Card Recipe:
Star Fold Card Base
I found a piece of paper at Hobby Lobby with Scripture and the Nativity on it.  I cut it to line the panels on the card.  I cut it strategically so the wording matched the figures on each corner.
Cricut Christmas Village  Cartridge
Gold Lace
Stickles

This is how the card looks opened.  I will have to  make a special envelope to mail it or give it.  

Challenges for this card: 
Corrosive Challenges - With a Flourish
Creative Inspirations Paint - Anything Goes
Dream Valley Challenges - Anything Goes
I Did It Creations - Christmas/Winte
Allsorts - Anything but square
Crafty Catz - anything goes 
Polkadoodle - shaped card 

PLEASE SCROLL DOWN FOR THE DOODLE PANTRY BLOG HOP!!!  
Thank you for stopping by today.  I hope you have a marvelous Monday.  I think I will probably be working in my yard today.  I called a guy last Monday to come mow for me and he hasn't shown up yet.  Oh Well, such is life.  God Bless You!!! Peggy


Saturday, November 5, 2011

DOODLE PANTRY BLOG HOP - CHRISTMAS ORNAMENTS - SWEET TOOTH BOXES, JOTS, CUTTLEBUG, DOODLE PANTRY

Hi Everyone!  Welcome to the Doodle Pantry 12 Days of Christmas Blog Hop!  Laurie at Doodle Pantry has created some amazing digital stamps.  She asked the Design Team to make projects with the digis that we wanted to use.  I decided to make some Christmas ornaments as my project. 

I first printed off the digis in color.  I then used the JOTS and Cricut Craftroom to weld an ornament together.  I left a circle in the front so the digi would show through.  I ran the ornment base through the Cuttlebug using the swirl embossing folder, then placed the digi inside and glued the ornament together.


I then used the Sweet Tooth Boxes cartridge to cut out a four ornament box at 11" out of gold and green shimmer paper.  I then used the JOTS cart to cut the 3D poinsettia for the top and inside of the box.  I added bling to the inside of each poinsettia (you can never have too much bling).   

 All in all - I really loved how this project turned out.  Please follow the blog to the next Design Team Member to see what she has made for your enjoyment.  Laurie is giving away numerous prizes - all you need to do to win is:

■ You must enter your url and name/email in the special LINKY in the blog hop post, this will put you in the drawing for prizes.
■If there are 59 or less entrants in the linky, Laurie will use random.org to choose 5 winners from all the Blog Hop entrants in the LINKY. If there are 60 or more entrants, she will choose 8 winners.
■Winners receive each a $10 coupon code for the shop.
■We would ask that you please comment on everyone's blog, but it is not mandatory in order to be randomly chosen as a winner.

Your next stop on the blog hop will be

http://pat-stamppaperandink.blogspot.com/

We hope you enjoy your journey and that you'll come back to visit us again!!  Happy Holidays!!  Donna


12 DAYS OF CHRISTMAS - DAY #5 - SOPHIE, ELEGANT EDGES, DESIGN STUDIO

Hi Everyone - It's day number five in the 12 Days of Christmas at Digital Delights at Louby Loo.  I must say that I just LOOOOVVVEEEE  this digi!!  To make this card, I did the following:


I cut the cardbase from the Sophie Cartridge at 7" using the snowflake card out of red cardstock. 

Using Elegant Edges, I cut the white scalloped doily shadow at 4.5" x 4" - then the red snowflake paper doily at  4.25" x 3.724".  I cut the green scalloped doily shadow at 3 3/4" x 3.119 and the green holly paper doily at 4" x 3.5".  I adhered them together to the cardbase.  I tied a red bow around the green square. 

I colored the Five Golden Rings digi with Promarkers and popped on red dotted paper. 


I then cut the border on the inside of the card using Elegant Edges.  

Please visit Wendy over at Digital Delights and see all the digis she has created for the 12 Days of Christmas.  I'm going to enter this card in a contest at a Circle Cricut Crop I'm going to today!!  Hope I win!!  Until another day, God Bless You!!   Donna

Friday, November 4, 2011

FOUR CALLING BIRDS - WILD CARD, DIGITAL DELIGHTS BY LOUBY LOO

Hi Everyone!  Can you believe that Christmas is less than two months away??  I know how you feel - it makes me feel sick to my stomach too.  I can't believe how fast this year has gone!! 

To celebrate the Christmas Holidays, Wendy at Digital Delights created the 12 Days of Christmas digis.  Believe it or not, but they are all the CUTEST!!!!  She is debuting one digi every day for 12 days.  Today is Day #4 - for Four Calling Birds.   To make this card, I used the Wild Card Cricut Cartridge to cut the Owl cardbase.  I then cut another cardbase out of brown shimmer paper.  I colored the digi with Promarkers and used Stickles on Ho-Ho's hat.  I popped the image on the front of the card. 

For the inside of the card, I cut out a cell phone using the My World Cricut Cartridge at 3" and popped it. 

I haven't put a sentiment on the card yet.  I have two sentiment combos that I'm trying to decide which I like better.  They are listed below, please comment and let me know which you think is best.

1.  Front - Helloooo!!  Inside - Whoo Whoo's calling?       

OR

2.  Front - Whoo's been naughty?  Inside - Whoo's been nice??

Please cast your vote and whichever gets the most votes is the one that I'll use and thanks ahead of time for your time and comments.

Thanks so much for stopping by.  Please hop over to Digital Delights today and the next eight days to view all the 12 Day of Christmas digis.  You'll be "delighted" that you did (did you catch the pun?)

Until another day, God Bless You!!  Donna  

Thursday, November 3, 2011

POPPETT - SOPHIE AND DIGITAL DELIGHT BY LOUBY LOO

Hi Everyone!  I must say that I think the digi that I used on today's card is one of my favorites.  I think it's adorable.  I might just use this card as my prototype for my Christmas cards this year.  And no, I haven't even started those yet!!


I used the Sophie Cricut Cartridge to cut the card base - notice the Christmas trees along the border.  I covered the cardbase with DCWV Christmas Paper.  I colored the digi (isn't he cute?) with Promarkers.  I then cut out the digi in a circle using the George cartridge and then cut another circle slightly bigger.  I used the Sophie cartridge to cut out a scalloped circle which I mounted the digi on.  I popped all three layers in the middle of the card after tieing a Ho-Ho ribbon around the card.  Then I added bling to the top right corner. 

On the inside of the card (which you can't see in this picture), I adhered a strip of the same Christmas paper used on the front of the card.  I then used the Martha Stewart Snowflake punch along the inside border.

Thank you for your visits and your comments.  Please drop by Digital Delights to see all the new Christmas digis that Wendy has created.  She is very talented!!

Until another day, God Bless You!!  Donna
Cricut Top 40